- 1. What is it
- 2. Why do this
- 3. Diagram
- 4. Lab
- 5. Validation
1. What is it Link to heading
4 steps to implement decryption on a network
- Work with stakeholder to develop a decryption deployment strategy
- Develop a PKI rollout plan
- Size the decryption firewall deployment
- Plan a staged, prioritized deployment
This Lab is about the 2nd step, develop a PKI rollout plan.
In this video, I will show you how to deploy Active Directory with the Certificate Authority service.
I will also show your how to join a computer to this Activie Directory domain.
Then, how to generate a CSR on the Palo and sign a certificate with it from the AD.
Finally, I will show you how to configure decryption with this new subordinate CA
2. Why do this Link to heading
Devices joined to the domain already trust the Enterprise Root CA.
This means that they will already trust the certificate that is sign by the Sub-CA when palo is doing decryption.
So you dont need to push a new certificate to the device to make decryption works.
This is what most enterprise do for decryption.
3. Diagram Link to heading
This is the same Lab as created in the other video previously.

The default route for W10 and AD is the Trust NIC of the Palo Alto in Azure.
To follow me with this lab, you can go to my other post that show how to deploy that lab in Azure with Terraform: Lab Deployment Post
4. Lab Link to heading
4.1 Configuration AD Link to heading
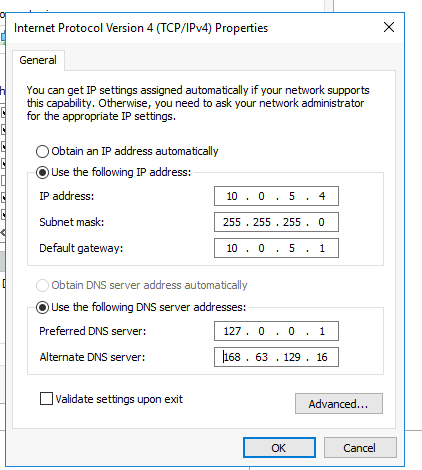
4.1.1 Add a static IP Link to heading
When installing the DNS server role, recommendation is to set up a static IP on the Windows server.
I will also configure the first DNS server to be itself(recursive) and second one to be Azure
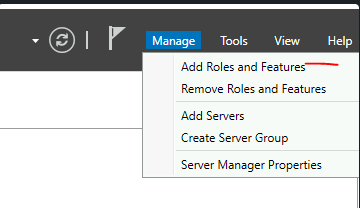
4.1.2 Add role and feature Domain and DNS Link to heading
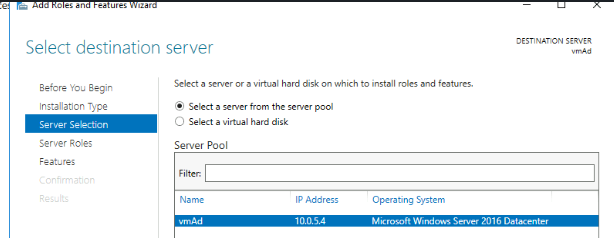
Manage - Add Roles and Features
Select - Role-based
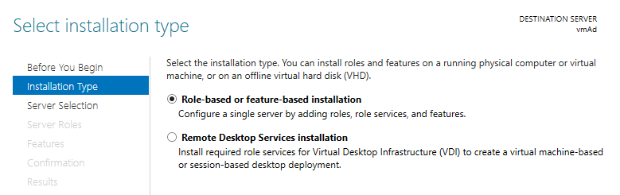
Select - Windows server
- Select 2 server roles:
- Active Directory Domain Services
- DNS Server
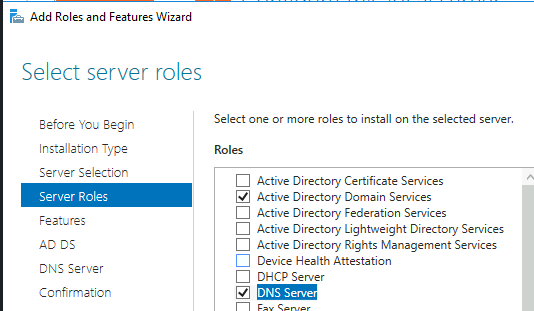
Next, Next … until Install
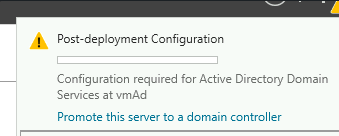
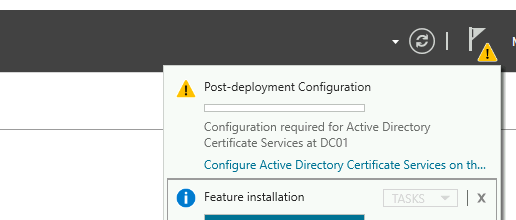
Once the installation is done, you will have a notification to do a Post-Deployment Configuration
Promote this server to a domain controller
Configure a new forest
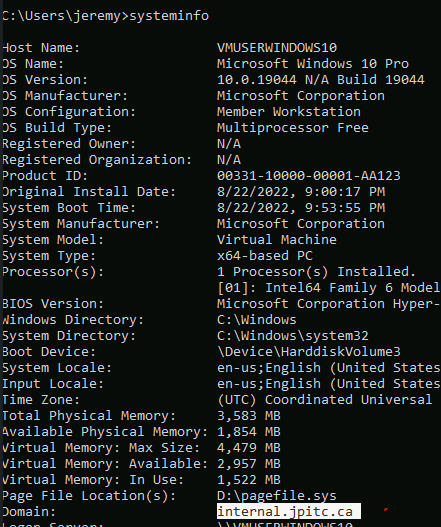
I will create an internal domain: internal.jpitc.ca
It can be anything for your lab.
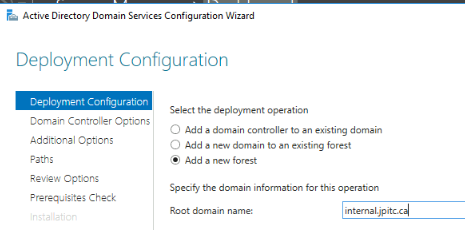
There is no need to create a DNS delegation.
The Netbios by default will be INTERNAL in my case, you could change it.
after the Prerequesites checks, server might reboot.
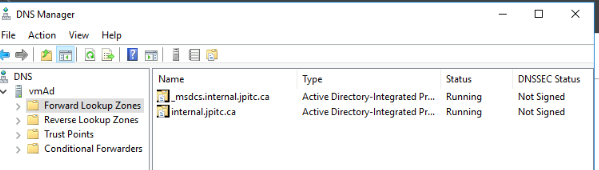
Validate that the DNS zones was created
4.1.3 Add role Certificates Services Link to heading
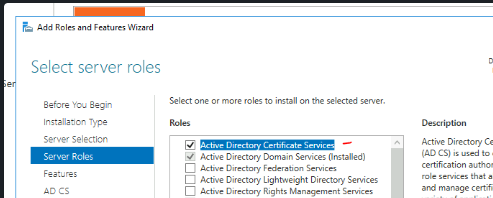
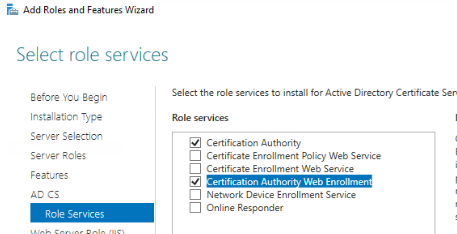
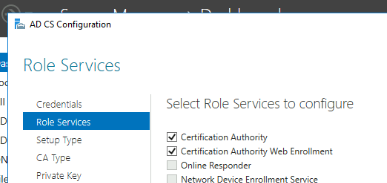
- Select Features:
- Certification Authority
- Certification Authority Web Enrollment (This will create a web portal to sign certificate)
Next, Next … until Install
Once the installation is done, you will have a notification to do a Post-Deployment Configuration
Configure Active Directory Certificate Services
- Select the role to configure:
- Certification Authority
- Certification Authority Web Enrollment
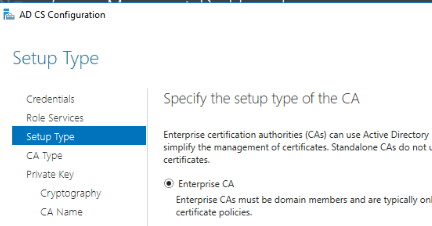
Setup Type: Enterpise CA
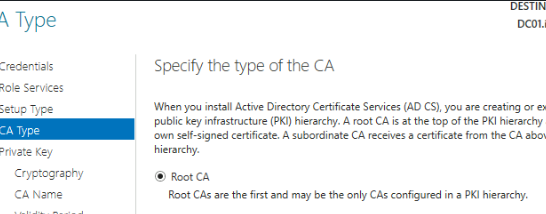
Type of CA: Root CA
next, until the CA Name
Here you leave it as default or choose a specific name for your ROOT CA
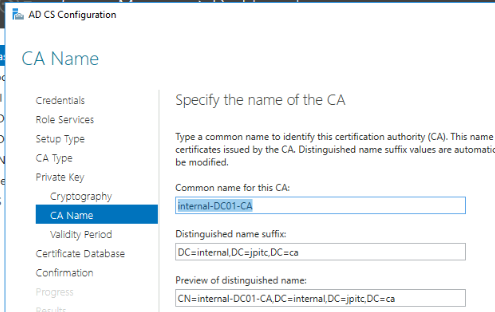
next until the end of the installation.
4.2 Configuration w10 machine Link to heading
Change the IP to a static IP
The first DNS server will be the Active Directory
Second DNS server will be Azure

4.2.1 Join to domain Link to heading
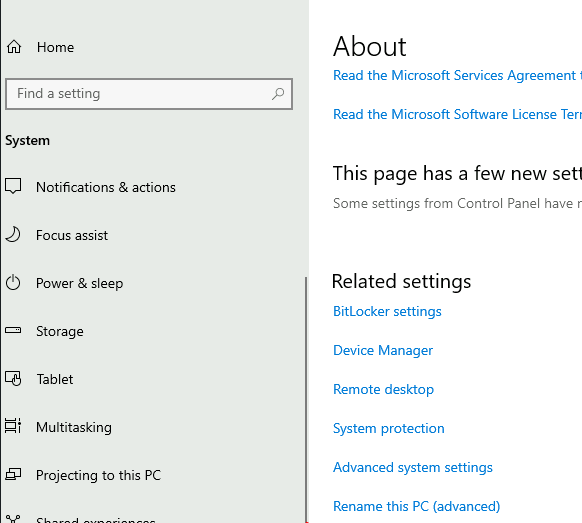
Go into About menu
Click on: Rename this PC (Advanced)
Click on Change this domain
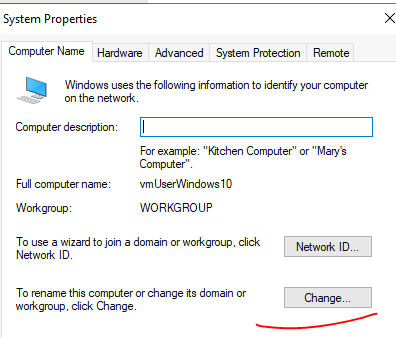
add the domain that was created on the AD
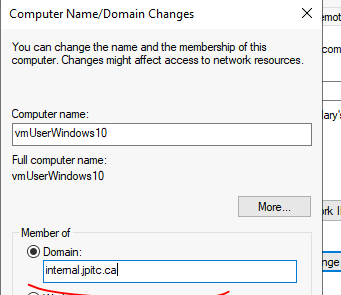
restart the machine if successful
Validate by going into CMD and doing:
systeminfo
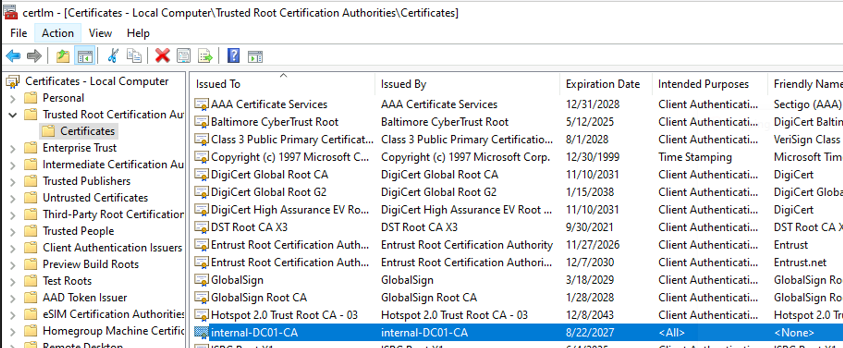
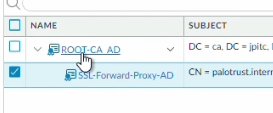
Check the certificate store to make sure you receive the ROOT-CA from the AD
RUN:
certlm.msc
4.3 Configuration Palo Alto Link to heading
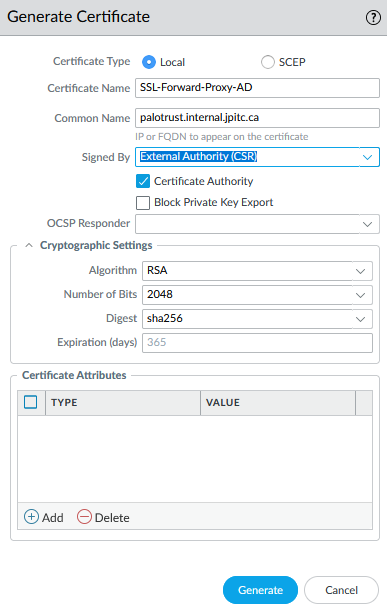
4.3.1 Create CSR Link to heading
Create a CSR on the Palo Alto certificate menu
name and CN dont matter
4.3.2 Sign CSR with ROOT CA Link to heading
Export that CSR on the windows10 machine, the private key will stays on the Palo Alto.
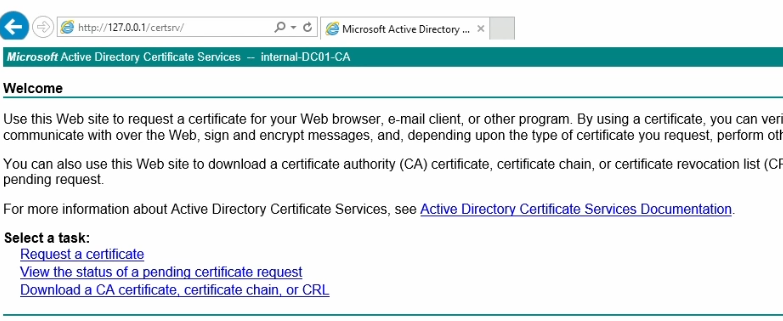
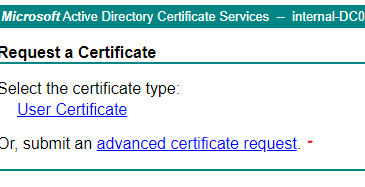
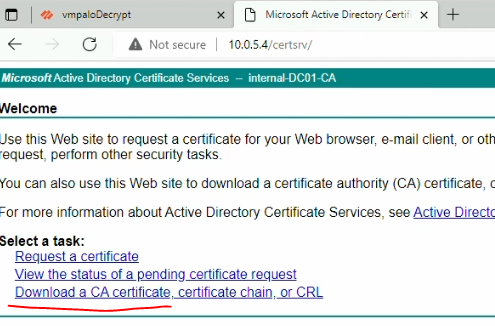
Go to the AD web enrollment previously created.
Click on: Request a certificate

Click on: advanced certificate request
Open the CSR into notepad, copy the content and paste it into the box.
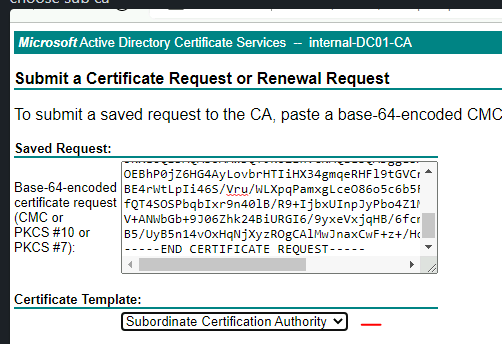
Finally, download the certificate in DER encoded format
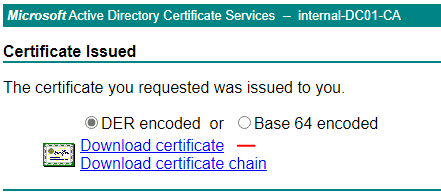
4.3.3 Transform CA format Link to heading
The certificate downloaded as an extension .cer
We need to change this to be .pem so we can import it on the Palo Alto.
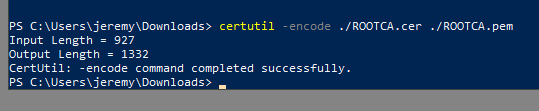
To do this we will use Powershell:
certutil -encode ./certnew.cer ./certnew.pem
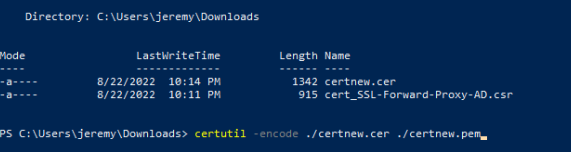
Now, we will import this certificate in Palo Alto.
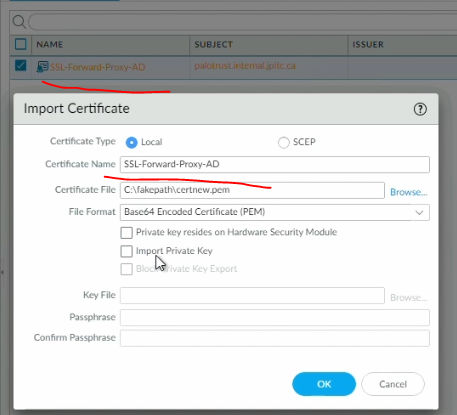
4.3.4 Import ROOT CA Link to heading
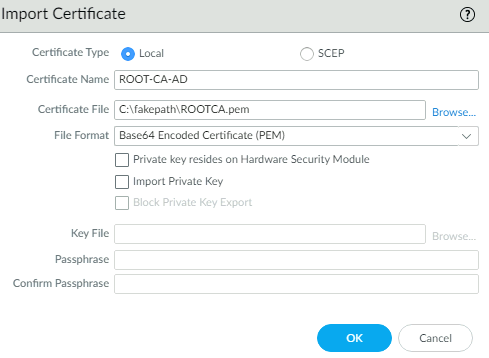
We will also export, change the format and then import the ROOT CA of the AD on the Palo Alto.
Go back to the web enrollment page, Click on: Download a CA certificate
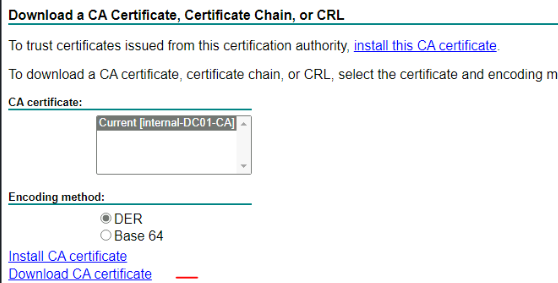
Transform the format with Powershell from .cer to .pem
certutil -encode ./rootca.cer ./rootca.pem
import it on the Palo Alto
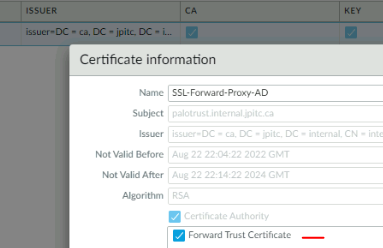
4.3.5 Configure cert type Palo Link to heading
We will assign the subordinate CA to be a Forward Trust certificate.
This means, that Palo Alto will use this certificate to sign other certificate when doing decryption.
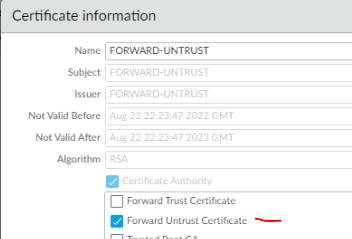
We also need to configure a Forward Untrust certificate.
This CA certificate will be used when Palo Alto does not trust a website certificate when doing decryption.
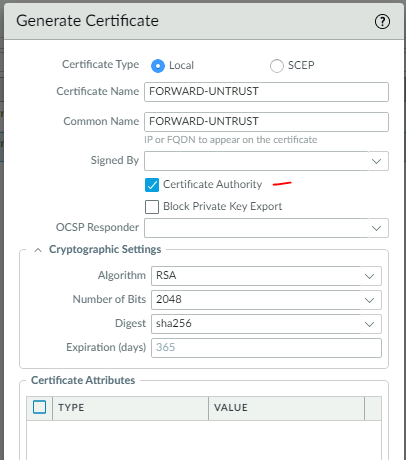
Change the format of the Untrust certificate to be: Forward Untrust Certificate
4.3.6 Create a decryption policy Link to heading
We will create a simple decryption policy to decrypt the traffic.
For this lab, the source IP will simply be the IP of the Windows10 machine.
Name: Decrypt Traffic
Source Zone: Trust
Source IP: 10.0.4.4(W10 machine)
Destination Zone: Untrust
Service: service-https(TCP443)
Action: Decrypt
Type: SSL Forward Proxy
Decryption Profile: None
Log: Successful/Unsuccesful SSL Handshake

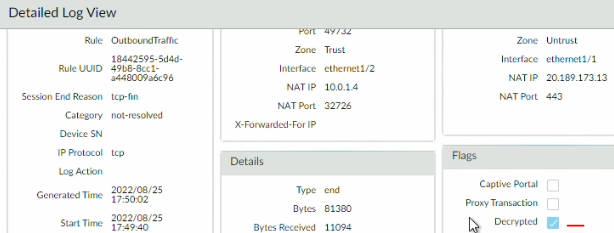
5. Validation Link to heading
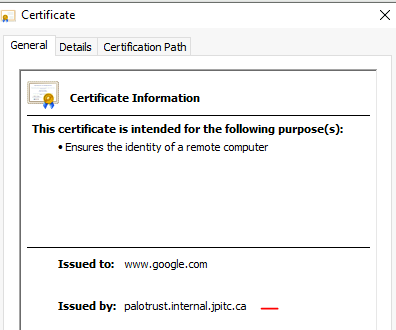
Open the browser on the Windows10 machine and visit a website.
Open the menu to show the certificate of the website.
It should show that it was issued by: palotrust.internal.jpitc.ca, the subordinate CA used for decryption.
You can also check the Traffic Log and expand a session to see if the decryption set is check.